I have been installing Satellite dishes and systems of all types on and off over the past fourteen years. I never go back to jobs where I left something loose or a dish fell off or was blown off by the wind. The only times I’ve fixed my mounts have been when roofers remove the dish. I try not to do jobs if I can’t do them right and when I do them right they never have problems related to my work.
There are few things that bother me more than professionals doing jobs with the skills of an inexperienced amateur. An experienced amateur would be better than the things some of these unskilled professionals do. Things from cutting corners, not pre-drilling holes for bolts into rafters or studs and as a result the wood splits.
So I see a lot of hack jobs when I go out to peoples houses to install yet another antenna on their house. Often times these are people who live in the middle of nowhere and have no land based internet options, ideally but not always. DirecTV and Dish installers will show up and put up a dish next to an older DirecTV or Dish antenna and run all new wires.
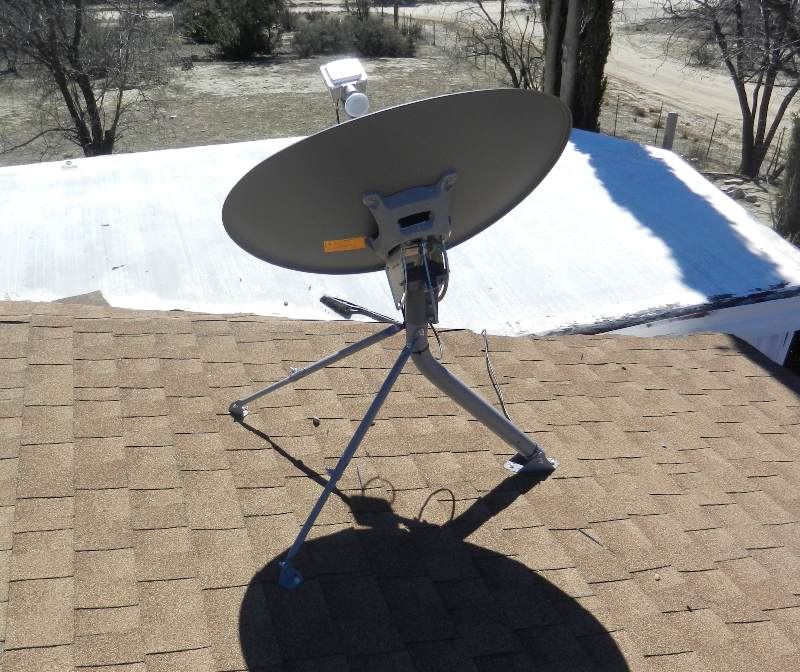
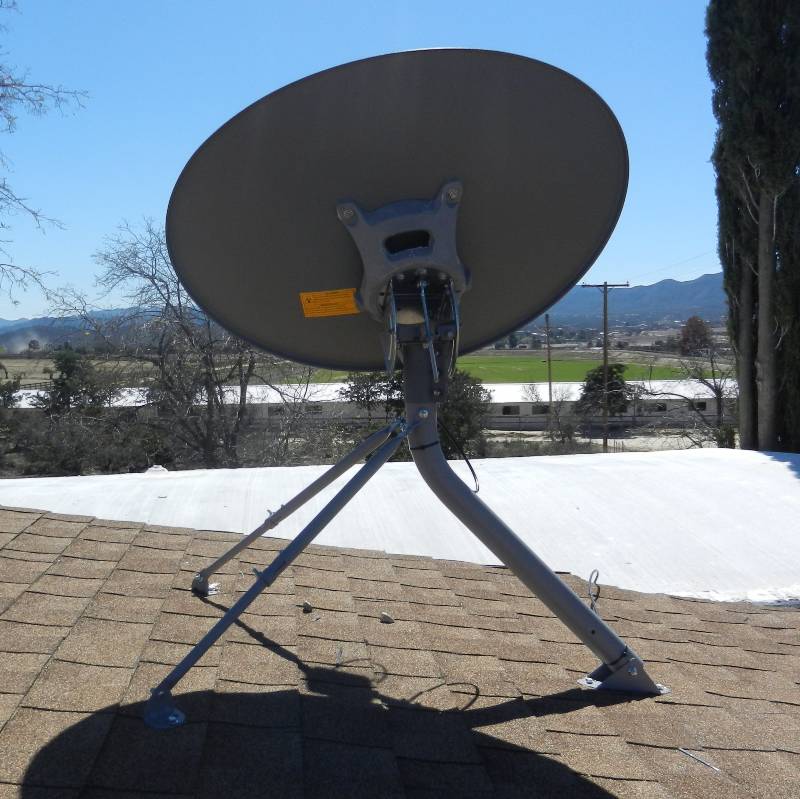
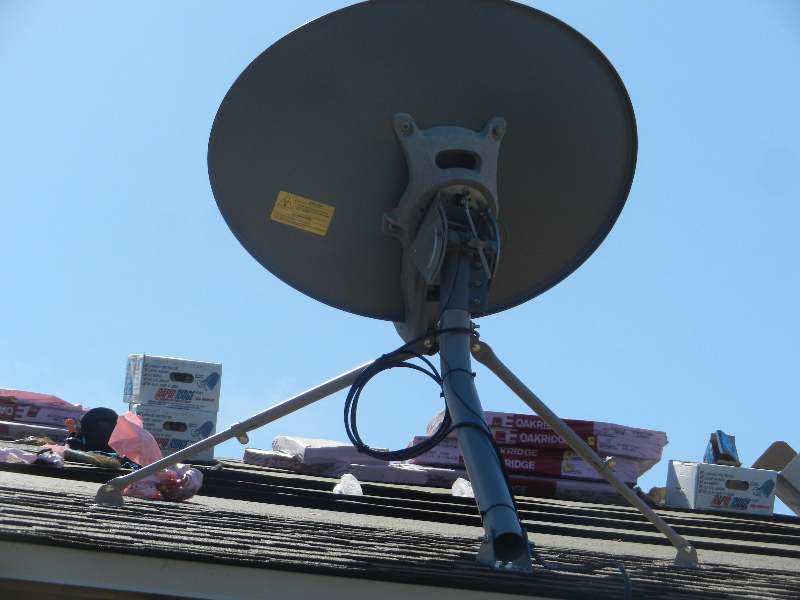
My biggest annoyance tho is backwards mounts and tripod mounts that are not tripods. Most of the tripod mounts are long enough to mount onto 16” studs and 24” rafters which is what most buildings are built with. So you can mount the base of the tripod in the center between two more rafters, giving a solid three point mount. Ideally you want this to be a even tripod yet people put the support arms along the same axis as the base of the tripod and there is very little support to keep it from lifting up and down, let me demonstrate in a picture gallery.
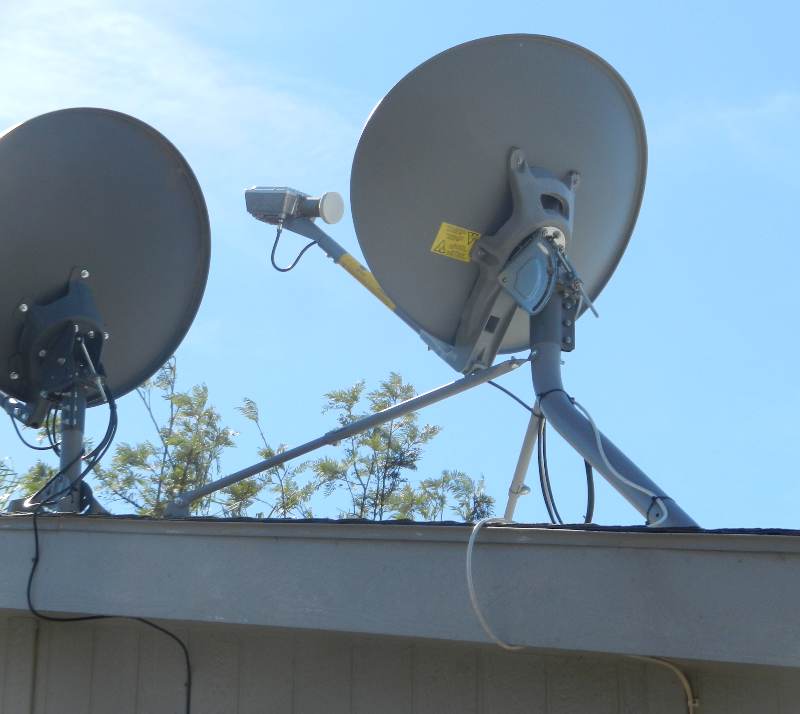
Let me start with some examples of what some properly mounted tri-mast mounts look like. The following few pictures are pictures of antennas with mount arms facing the correct orientation. Take a note of how the main support arm is directed with the roof rather than against it like you will see in the pictures after the correct ones. The support arms are also widely spaced to offer strong stability in a tripod configuration.
In the pictures below you will see backwards mounts. Lets take a look at a few very common mistakes people make when mounting dishes to roofs. These are also the same people that end up with leaks in roofs. I’ve never had a roof leak.
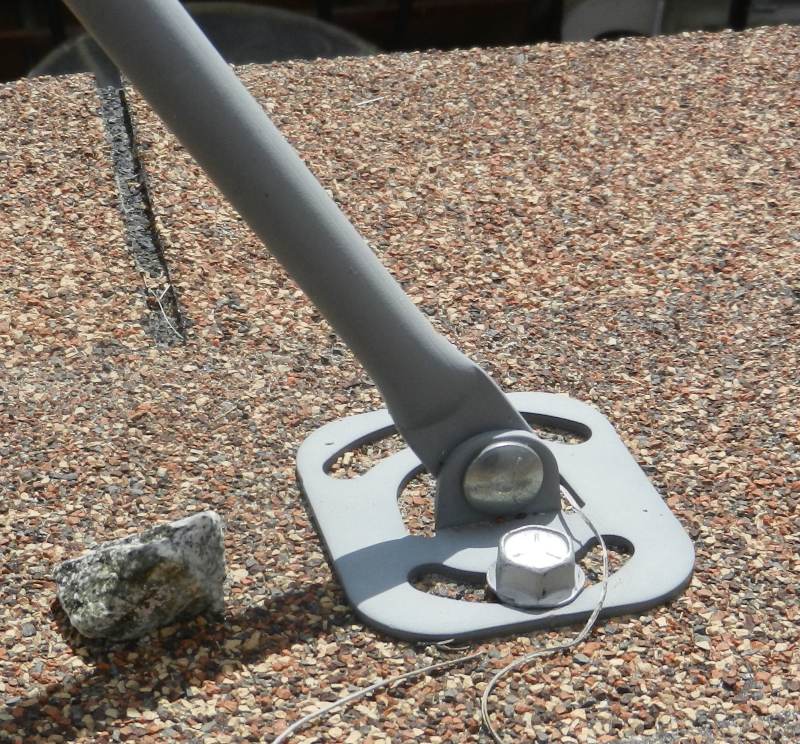
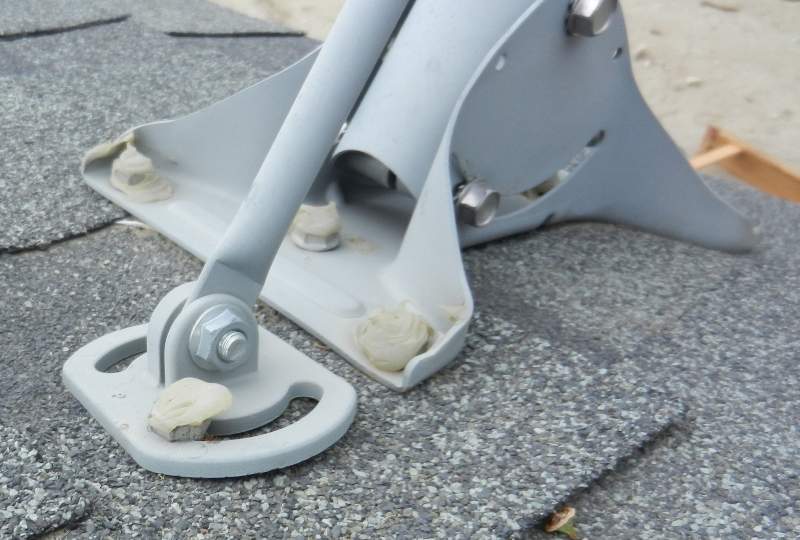
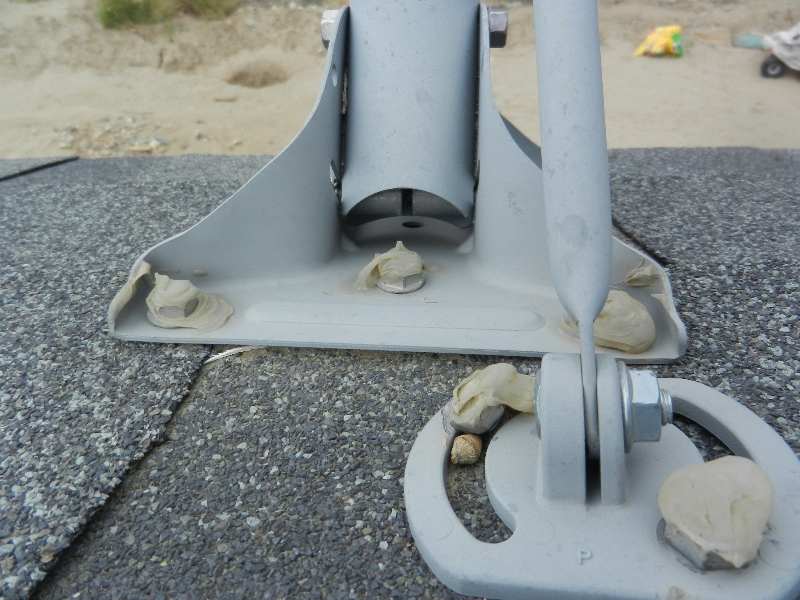
The above pictures show an unsealed mount and a mount that has silicone rtv, not a roof sealant, covering only the top of the bolt. Silicone will work for a short time if you get it in between the holes and the bolts, if its sitting on top of the bolt and not covering the hole bolt and hole then it is useless. The picture below shows a properly mounted support arm that is glued into the hole smashing the glue around the bolt and mount creating a complete seal. Mounts done in this fashion never leak.
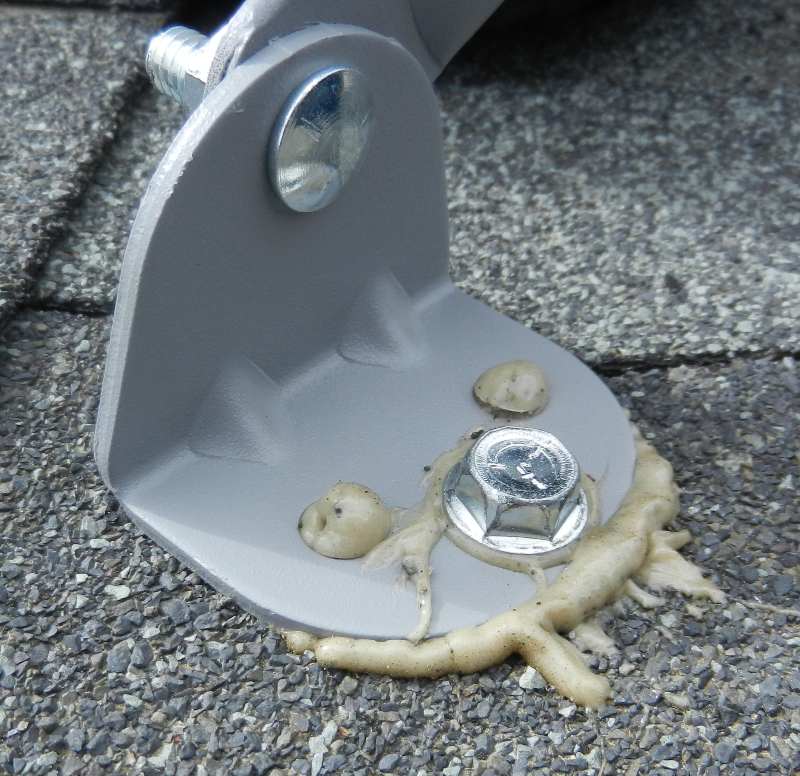
The glue used show above is Loctite PL Premium Polyurethane Construction Adhesive, it will last half a century. Once it dries it becomes a solid part of the roof and if you ever take the mount down you will have to leave the support feet.
The next picture will show a backwards mount. This backward mount also has the tripod arms placed very close together and it does not create a strong spread out tripod that is solidly mounted. There are a few other things wrong with this mount. Notice the lack of service loop and the fact the dish is bolted onto an adapter that adapts the poor mount for a smaller dish rather than mounting another mount.
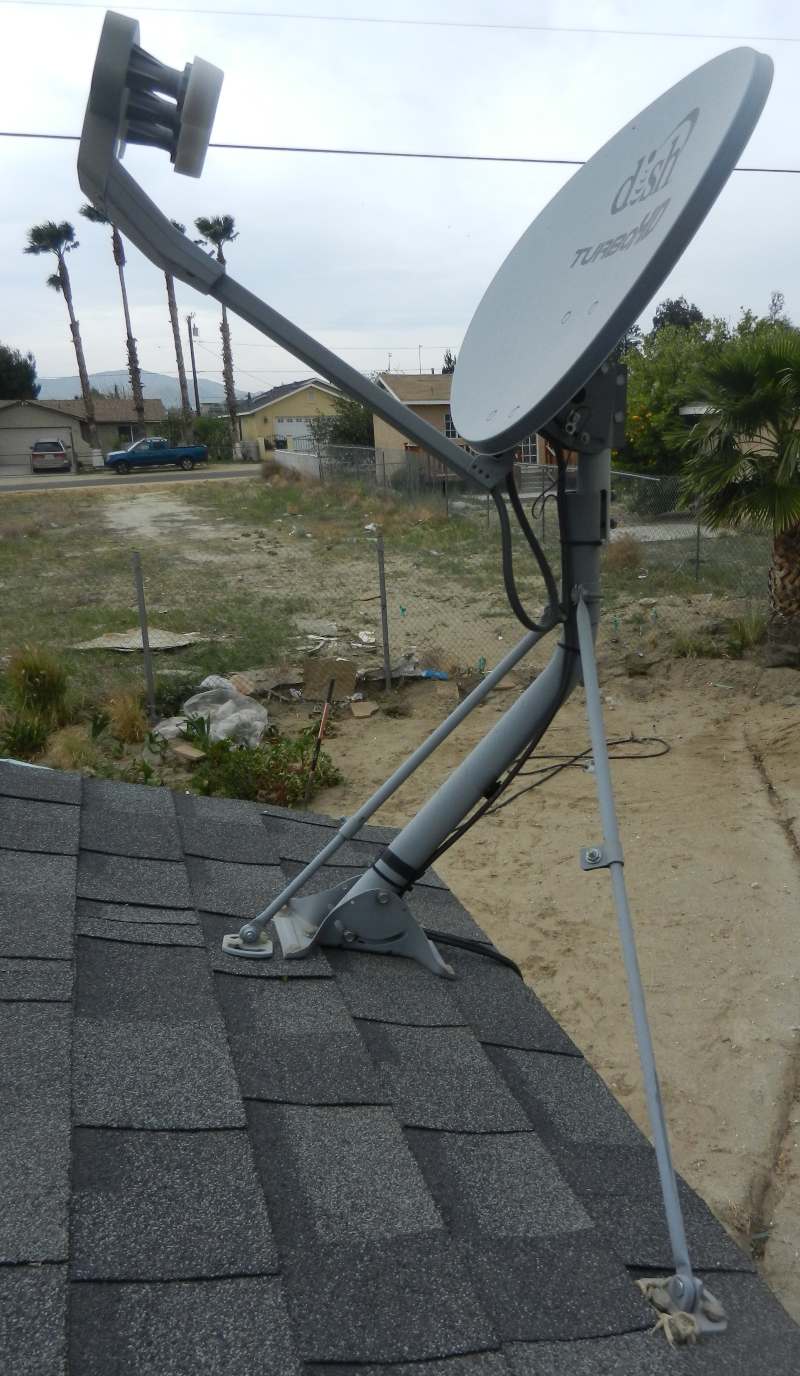
The above mount is a DirecTV mount with a Dish antenna on it. Dish antennas use different size mounts and so there is a mount adapter. This isn’t so bad but the mount itself is poor and shouldn’t be used. The installer obviously wanted to save having to install a mount and used an existing one. Something I couldn’t easily picture is that the mount is not bolted into any roof rafters, despite having open eaves that you can measure from below, the installer of this is just mount bolted into the plywood. This would probably okay but the location regularly experiences winds of 60mph and gusts of 80-100mph winds.
Here is that same mount next to a tripod mount that was properly mounted. The left mount will take any winds that the house will take.
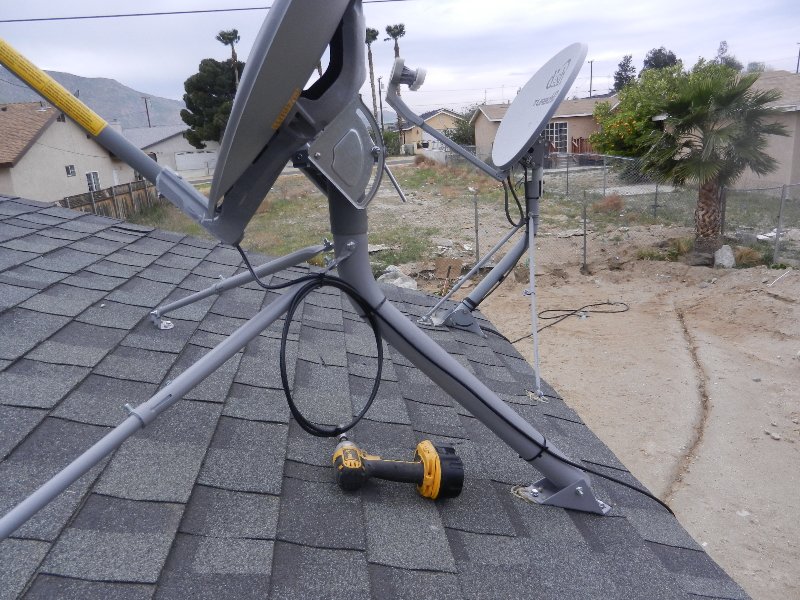
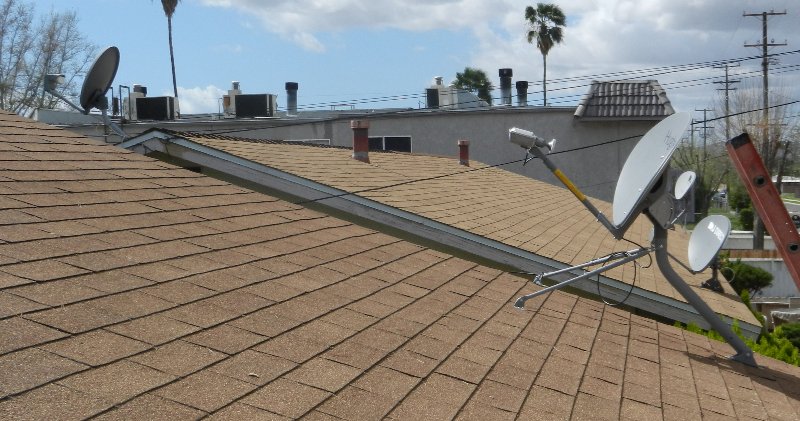
Two correctly mounted dishes and two backwards. Notice the dish on the left at the near peak. There is no need for it to be up that high. The wire runs down to the front of the house so placing it closer would have been easier and less ladder work.
Other Poor Mount Choices and Hack Work
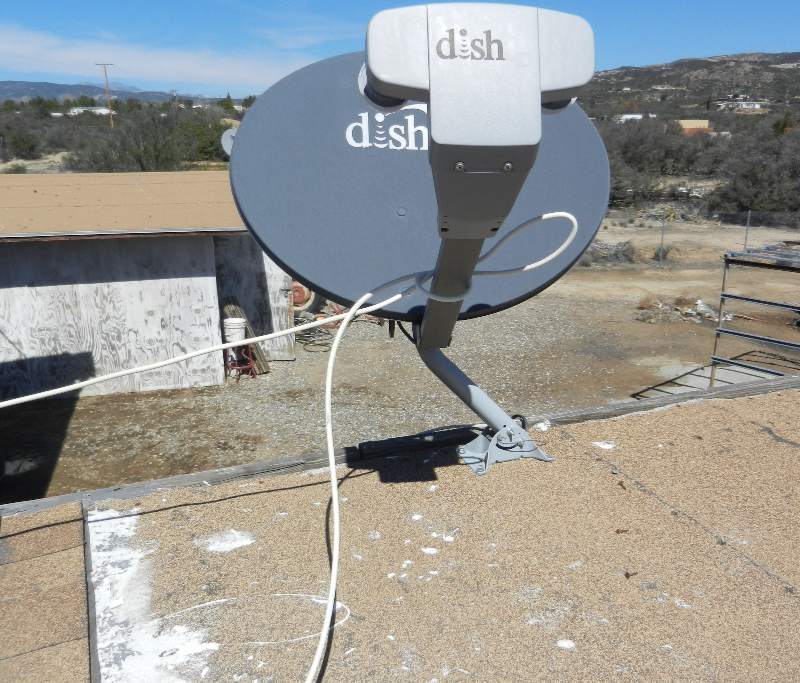
The above antenna is mounted on a flat roof with no sealant. The wire is fastened with a knot around the arm. This dish however is unused.
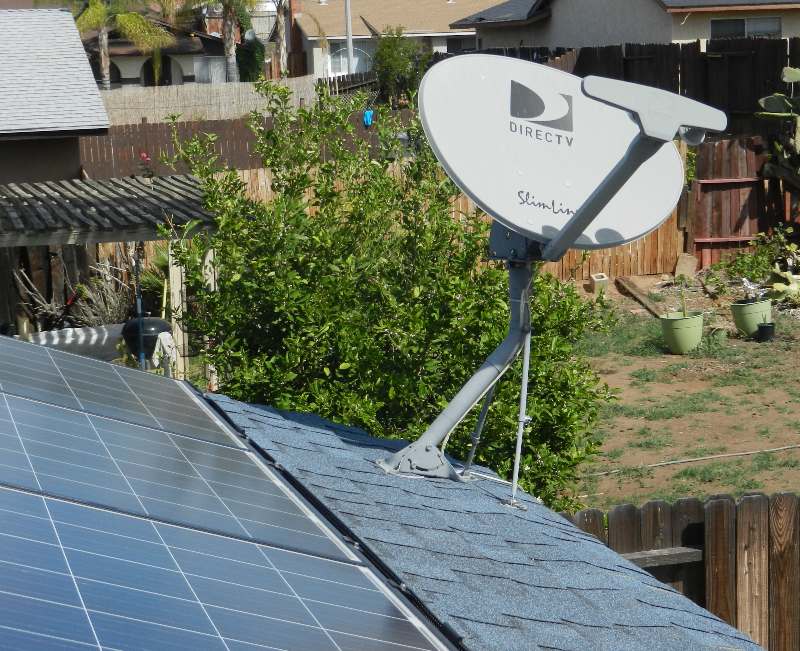
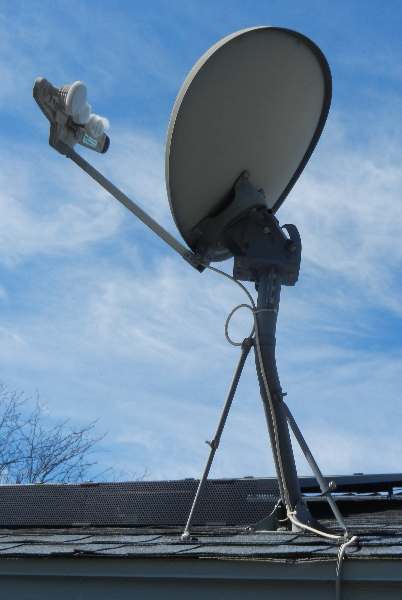
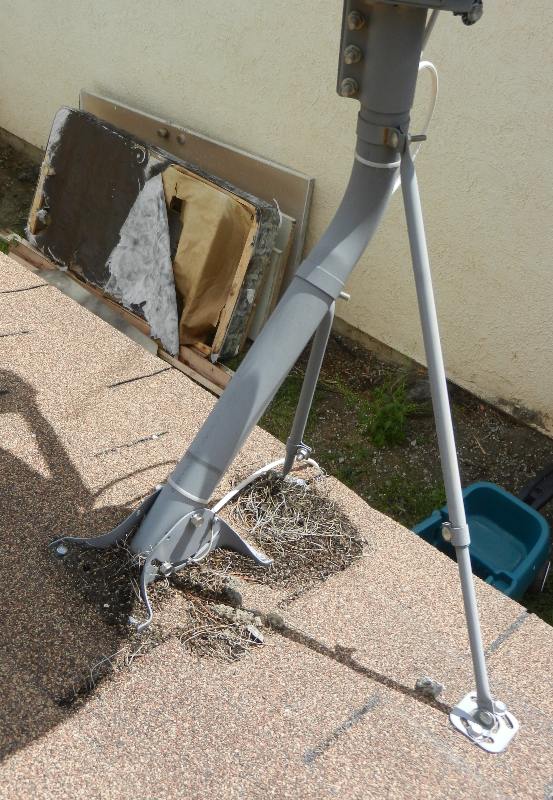
These dishes are tripod mounts which need to be spread out like a tripod which can be very strong. Unfortunately people place the arms too close together to really do much good. One antenna also shadows the solar cells during the morning.
Just Plain Wrong
In my rant so far I have shown you a few different errors of dishes. I would like to believe that it was done with stupidity and not laziness. But this next set of photos will show you a tripod that is inline and sagging on the roof. The weight of the antenna is pulling the bolts out of the roof, causing it to sag and loose signal. These are old photos taken with a camera phone so be gentle.
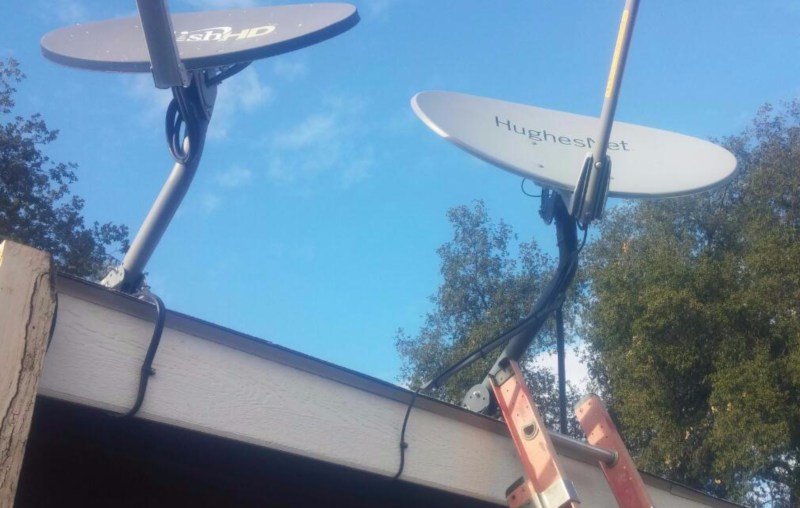
This one has two backwards mounts, but even worse the following has the tripod inline.
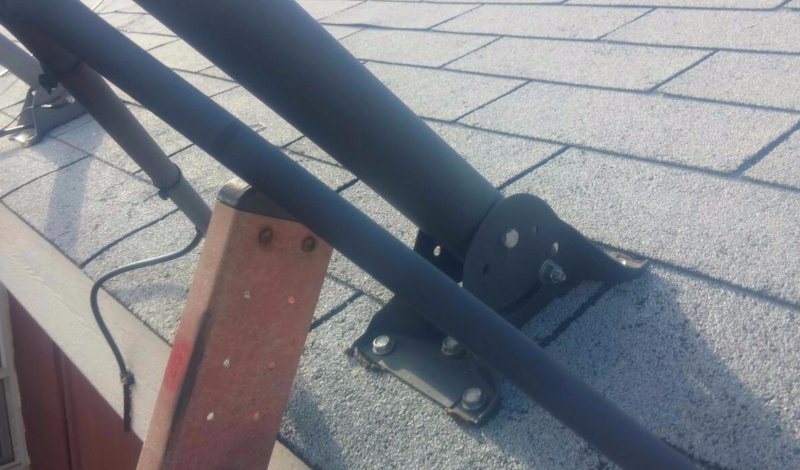
The next photo may be a bit confusing, but it shows that someone took an Exede/ViaSat mount and affixed a Hughes Net antenna to it.
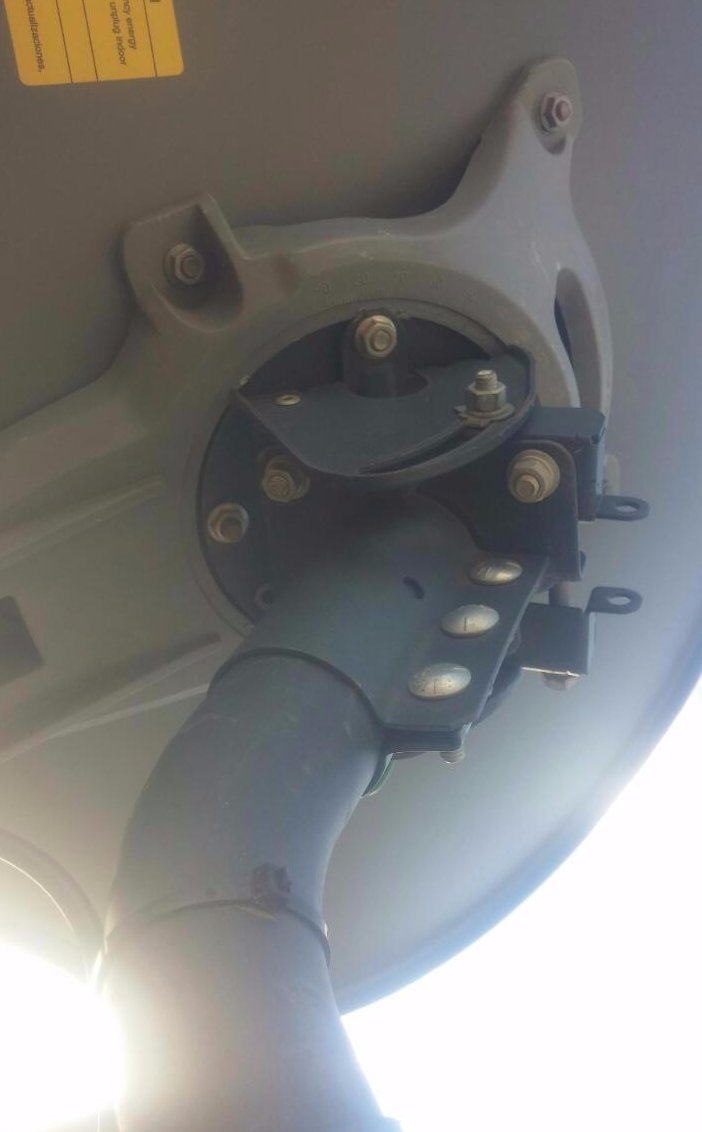
People do these hack jobs and I get called out to them. Once I get more pictures I will post another post with more common mistakes that people make, such as mistakenly placing the dish at the highest point rather than any working spot because a satellite 23,000 miles away needs an extra 15 feet to get better signal. All they do is make the job harder for them and others to service, which I suspect is a reason why houses end up with several generations of satellite dishes all mounted at various locations.
This isn’t the end of my rant. I just have ran out of photos for the moment and cant wait to collect more before posting this post. Look for a part two if you like that sort of thing. It’ll have a more complete collection of strange, weird, and bad work. I might even include some non antenna related photos who knows!. Peace out.